Wednesday, July 24, 2013

Homemade and Healthy is Very Lovely


I love mason jars! Who doesn't these days?  They are so handy for storage and so pretty! We use them a lot!  To keep salad greens fresh longer, to create a light fixture for our kitchen, and even as wedding ceremony décor (thanks to a friend who made them for my bridal shower)!

This week, I decided to use them for storing a homemade jam.  Ben and I have been trying to eat clean for the past several months (though our recent trip to Florida was anything BUT clean!) Well, I found a clean eating recipe on Pinterest.  I  guess, by this point you all get the idea that I get most of my grand schemes from there!  Anyway, the recipe comes from a blog called The Gracious Pantry.  The blogger, Tiffany McCauley, shares TONS of clean eating recipes.  If you're looking to eat healthier and eliminate the nasty stuff that is added to SO many store bought items, check her out!  This time, I made her Clean Eating Strawberry Chia Seed Spread.

This is a super simple recipe!

  • 2 cups strawberries – cleaned and chopped
  • 1 cup water
  • 1/4 cup chia seeds
  • 1/4 cup honey
  • mason jars (one batch makes about 1 & 1/2 pint-sized jars.)

  •  
     
    1. Clean strawberries.
     
     
    2. Chop strawberries.  I made two batches. The first, I sliced, which you'll see in the picture.  The second was chopped and it seemed to help the berries dissolve more quickly. 
     
     
    TIP: Use a garbage bowl for the strawberry tips.  I think that's a Rachael Ray thing.  Its easier while you're chopping.  Plus, if you like to compost (like my hubby), its easy to add to the pile. 
     
    3. Combine ingredients in pot.
     
    Cooking tip:
     
    4. Bring to a boil.
    5. Reduce heat. 
    6. Continue stirring till it boils again; should have reduced by half and thickened.  Will be thinner than typical jam. 
    7. Cool for 1 hour.  Refrigerate overnight before use.
    So, this was my breakfast. Its a lot of bread, but I wanted to taste the spread two ways.  One slice has only the strawberry chia seed spread, the other has peanut butter, as well.  I have to agree with The Gracious Pantry.  The spread is much thinner than regular jam. So, I didn't really enjoy it on toast alone.  I LOVED the slice with the peanut butter and spread.  I really want to try it in crepes!  I'm sure that would be yummy! 
     
    Like I mentioned earlier, I made two batches, which made nearly 3 jars.  One for Ben and me, one for a friend, and one for a lucky reader. If you're interested in this DELICIOUS clean spread, leave a comment.  I'll select a winner on Friday, July 26th.  


    Thursday, July 11, 2013

    Here Goes Nothing...

    So, this week my project was more like a challenge from my hubby.  He knows I have pinned multiple Pinterest projects with pretty air return vents.  Because our vent looks like this...

    So, I pin fancy ones like this...
     BUT, the link is actually to a website that sells expensive vents and not to a wonderful home project! SAD!  Seriously, one of the vents is even listed at $889.99!!! CRAZY!  Anyway, Ben suggested I try another pin from The Friendly Home:


    I make no promises....here goes! 
     
    First, I made a trip to Home Depot for supplies: sheet metal and oak for the trim (Wood lesson: oak is good when staining and pine when painting).  And it only cost $26.70!  Take that $889.99 air vent! 


    STYLE DISCLAIMER:  As you may be able to see, we have a LOT have oak around our house.  The house was built in the 1950's when oak trim was all the rage.  Someday, when I have more time, I want to paint it all white. oh, sigh!...............But, I'm a little short on time since I'm working on my masters right now.  
     
    ANYWAY, all that to say, I decided I needed to stick to the current oak style (even though its not the most glamorous).  
     
    Here are those supplies:
     
     
    Let's have a little sidebar conversation about removing stickers!  Seriously, I think that was the worst part of the whole project!  I tried a few ways I found on....pinterest (shocker, huh?)!!!
     
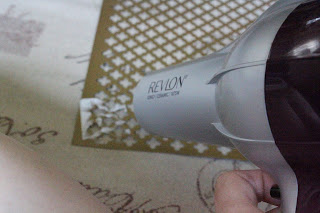
    Hair dryer for metal...BAD!
    

    However, rubbing alcohol did work well!
     
    What do you do to remove stickers?  I'd love to hear your thoughts! 
     
    
    Okay, back to the mission...So, I started by staining the trim with an can of stain we had left over from our kitchen counter, since we are hoping to someday paint it white anyway.  Do you like the classy recycling bins I'm using?


    Then, my awesome hubby, who got me into this project, helped cut the oak.  He used this nifty thingy called a miter box (its for cutting trim or other stuff that needs an angle.)  That thing is amazing! I hadn't thought this part through and it would have probably looked pretty bad left to my own devices!
     
    Then, it was time for assembly!  We used trim screws for creating the frame and tack staples to attach the sheet metal to the frame. And....drumroll, please.................................................................


    and...anti-climactic!  It's not so pretty!  Remember what I said about painting it all white someday?  I can't wait!  I think I'll love this vent then.