Friday, August 9, 2013

Time to Take This Show on the Road...to School

So, it's Back to School time!  Panic and chaos are constant.  Teachers everywhere hope its just a dream and we'll awake and its really just the 2nd week of June.  But, nope.  This is reality!

In the name of loveliness, I decided to add a little of it to my classroom.  For months, my teacher friends have been talking about making banners using book jackets.  I walked into their rooms this week and....follow through! They have the banners up and they're BEAUTIFUL!  I have also been talking about it...but haven't done it!  SHOCKER! Not, so much!  I'm kind of a procrastinator.  Any of my kind out there?! Can I get an amen?  BUT, I said, "procrastination will not get me this time!"

First, I gathered my book jackets.  Many are from books in my classroom.  Others are left from an awesome librarian friend who used to mail them to me from Orlando.  Yes, Charlene, I still have some left. 


The next step was to glue the jacket together.  I would not have thought to do this.  Meghan from A Carry-on and a Camera (one of the teachers I was talking about earlier) suggested the idea.  And I'm glad I did!  It looks much neater. 

Then for the fun part...HOT GLUE!  I LOVE using hot glue guns!  I don't know why.  Maybe its the smell.  Maybe its the fact that for so many years of my life it was a "grown-up" tool and now I'M a "grown-up."  But, whatever the reason, its one of my favorite crafty tools to use. 


Anyone else have a favorite go-to item???....double-sided tape, sharpies, rubber cement....???  I'd love to hear about it!

So, hot-glued the back of each book jacket to ribbon (left-over from my wedding over a year ago...we have ribbon coming out of our ears here at home!  Hey, maybe ribbon is your thing!)


And that was pretty much it!  The banner or bunting....I read that somewhere.  Bunting sounds fancier!  Here is the finished product:


 I'm so loving the way the bunting turned out!  As you can see, I made 3 smaller sections instead of one long strip.  I'm loving the little bit of beauty I added to my classroom.  Maybe this will make me more excited for school to start....or maybe not!  Either way, its pretty and it makes me smile!  And teacher-bonus....maybe it will get my kiddos excited to read those books!

Wednesday, July 24, 2013

Homemade and Healthy is Very Lovely


I love mason jars! Who doesn't these days?  They are so handy for storage and so pretty! We use them a lot!  To keep salad greens fresh longer, to create a light fixture for our kitchen, and even as wedding ceremony décor (thanks to a friend who made them for my bridal shower)!

This week, I decided to use them for storing a homemade jam.  Ben and I have been trying to eat clean for the past several months (though our recent trip to Florida was anything BUT clean!) Well, I found a clean eating recipe on Pinterest.  I  guess, by this point you all get the idea that I get most of my grand schemes from there!  Anyway, the recipe comes from a blog called The Gracious Pantry.  The blogger, Tiffany McCauley, shares TONS of clean eating recipes.  If you're looking to eat healthier and eliminate the nasty stuff that is added to SO many store bought items, check her out!  This time, I made her Clean Eating Strawberry Chia Seed Spread.

This is a super simple recipe!

  • 2 cups strawberries – cleaned and chopped
  • 1 cup water
  • 1/4 cup chia seeds
  • 1/4 cup honey
  • mason jars (one batch makes about 1 & 1/2 pint-sized jars.)

  •  
     
    1. Clean strawberries.
     
     
    2. Chop strawberries.  I made two batches. The first, I sliced, which you'll see in the picture.  The second was chopped and it seemed to help the berries dissolve more quickly. 
     
     
    TIP: Use a garbage bowl for the strawberry tips.  I think that's a Rachael Ray thing.  Its easier while you're chopping.  Plus, if you like to compost (like my hubby), its easy to add to the pile. 
     
    3. Combine ingredients in pot.
     
    Cooking tip:
     
    4. Bring to a boil.
    5. Reduce heat. 
    6. Continue stirring till it boils again; should have reduced by half and thickened.  Will be thinner than typical jam. 
    7. Cool for 1 hour.  Refrigerate overnight before use.
    So, this was my breakfast. Its a lot of bread, but I wanted to taste the spread two ways.  One slice has only the strawberry chia seed spread, the other has peanut butter, as well.  I have to agree with The Gracious Pantry.  The spread is much thinner than regular jam. So, I didn't really enjoy it on toast alone.  I LOVED the slice with the peanut butter and spread.  I really want to try it in crepes!  I'm sure that would be yummy! 
     
    Like I mentioned earlier, I made two batches, which made nearly 3 jars.  One for Ben and me, one for a friend, and one for a lucky reader. If you're interested in this DELICIOUS clean spread, leave a comment.  I'll select a winner on Friday, July 26th.  


    Thursday, July 11, 2013

    Here Goes Nothing...

    So, this week my project was more like a challenge from my hubby.  He knows I have pinned multiple Pinterest projects with pretty air return vents.  Because our vent looks like this...

    So, I pin fancy ones like this...
     BUT, the link is actually to a website that sells expensive vents and not to a wonderful home project! SAD!  Seriously, one of the vents is even listed at $889.99!!! CRAZY!  Anyway, Ben suggested I try another pin from The Friendly Home:


    I make no promises....here goes! 
     
    First, I made a trip to Home Depot for supplies: sheet metal and oak for the trim (Wood lesson: oak is good when staining and pine when painting).  And it only cost $26.70!  Take that $889.99 air vent! 


    STYLE DISCLAIMER:  As you may be able to see, we have a LOT have oak around our house.  The house was built in the 1950's when oak trim was all the rage.  Someday, when I have more time, I want to paint it all white. oh, sigh!...............But, I'm a little short on time since I'm working on my masters right now.  
     
    ANYWAY, all that to say, I decided I needed to stick to the current oak style (even though its not the most glamorous).  
     
    Here are those supplies:
     
     
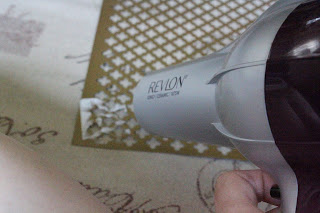
    Let's have a little sidebar conversation about removing stickers!  Seriously, I think that was the worst part of the whole project!  I tried a few ways I found on....pinterest (shocker, huh?)!!!
     
    Hair dryer for metal...BAD!
    

    However, rubbing alcohol did work well!
     
    What do you do to remove stickers?  I'd love to hear your thoughts! 
     
    
    Okay, back to the mission...So, I started by staining the trim with an can of stain we had left over from our kitchen counter, since we are hoping to someday paint it white anyway.  Do you like the classy recycling bins I'm using?


    Then, my awesome hubby, who got me into this project, helped cut the oak.  He used this nifty thingy called a miter box (its for cutting trim or other stuff that needs an angle.)  That thing is amazing! I hadn't thought this part through and it would have probably looked pretty bad left to my own devices!
     
    Then, it was time for assembly!  We used trim screws for creating the frame and tack staples to attach the sheet metal to the frame. And....drumroll, please.................................................................


    and...anti-climactic!  It's not so pretty!  Remember what I said about painting it all white someday?  I can't wait!  I think I'll love this vent then.   


    Monday, June 24, 2013

    Let's start at the very beginning

    Maybe its because of my mom and her uncanny ability to arrange flowers.  Maybe its because of my awkward teenage years filled with anything but loveliness.  Or maybe its because of some innate quality given by God to appreciate beauty in His creation.  But, whatever the reason, I love to find loveliness around me. 
    Like my beautiful magnolia tree ...
     
    or my sister's precious twins...
    
     
    And I just want to add more beauty to my corner of the world.

    I don't know about you, but Pinterest is one of my favorite things!  It is SO lovely!  It is filled to the brim with pretty things!    I can lose HOURS browsing boards!  And I'm sure, I'm not alone.  Do I hear an amen?  All the possibilities!  I am particularly drawn to DYI & Crafts.  There's just something about the possibility of creating that thrills my heart! 

    Considering my love affair with pinterest, I think the most appropriate way to kick off this blog is with one of the pins on my DYI board just waiting to be made.   So, here goes nothing...

    Oh, Martha Stewart!  You're level of perfection is SO unattainable!  And yet again, you've drawn me in.  The other day I decided to make her personalized coasters for my sister-in-law's birthday.

    I started with blue painters tape, cork coasters (only $2.77 for a set of 6 at Hobby Lobby), craft paint, paint brushes, and vinyl letters.  The vinyl letters were really tough to find!  I finally found mine at Home Depot near all the numbers for addresses. 
    The next step was to tape the coasters to make the design.  For some of the coasters, I cut the painter's tape to make skinnier lines.  I also, added the vinyl letters and numbers (for my brother and sister-in-law's anniversary date). 
    Next, I started painting!   I gave each coaster two coats.  Note to all future DYIers...use a GOOD paintbrush!  Seriously! I began with a cheap brush.  The bristles kept sticking to the paint.  AHHH!!! Thankfully, my husband is the artsy-type and had a good brush for me to use! 


    Next, my hubby saved the day again!  He suggested I remove the tape before it completely dried.  I guess that's the way real painters do it!  Apparently, if you wait till its dry, paint could flake off
    I decided to get creative and add stripes to a letter.

    The result...
    I don't love that!

    But, overall, I am pleasantly surprised by the results...
    I was so enamored with them that I made another set as a hostess gift for a friend! 
    So, YEA for the newest pretty creations! I would highly recommend this DYI!  Here's hoping these will add a little more loveliness to my sister-in-law's life!