So, I pin fancy ones like this...
BUT, the link is actually to a website that sells expensive vents and not to a wonderful home project! SAD! Seriously, one of the vents is even listed at $889.99!!! CRAZY! Anyway, Ben suggested I try another pin from The Friendly Home:
I make no promises....here goes!
First, I made a trip to Home Depot for supplies: sheet metal and oak for the trim (Wood lesson: oak is good when staining and pine when painting). And it only cost $26.70! Take that $889.99 air vent!
STYLE DISCLAIMER: As you may be able to see, we have a LOT have oak around our house. The house was built in the 1950's when oak trim was all the rage. Someday, when I have more time, I want to paint it all white. oh, sigh!...............But, I'm a little short on time since I'm working on my masters right now.
ANYWAY, all that to say, I decided I needed to stick to the current oak style (even though its not the most glamorous).
Here are those supplies:
Let's have a little sidebar conversation about removing stickers! Seriously, I think that was the worst part of the whole project! I tried a few ways I found on....pinterest (shocker, huh?)!!!
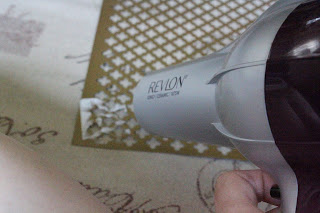
Hair dryer for metal...BAD!
However, rubbing alcohol did work well!
What do you do to remove stickers? I'd love to hear your thoughts!
Okay, back to the mission...So, I started by staining the trim with an can of stain we had left over from our kitchen counter, since we are hoping to someday paint it white anyway. Do you like the classy recycling bins I'm using?
Then, my awesome hubby, who got me into this project, helped cut the oak. He used this nifty thingy called a miter box (its for cutting trim or other stuff that needs an angle.) That thing is amazing! I hadn't thought this part through and it would have probably looked pretty bad left to my own devices!
Then, it was time for assembly! We used trim screws for creating the frame and tack staples to attach the sheet metal to the frame. And....drumroll, please.................................................................
and...anti-climactic! It's not so pretty! Remember what I said about painting it all white someday? I can't wait! I think I'll love this vent then.


I think your new vent looks great from the picture you posted! It would probably look good in white too like you were suggesting. I LOVE pinterest projects. What I use to get rid of sticky stuff is goo-gone. It's orange in color and works like magic.
ReplyDeleteThatch thanks for the support, Julie. I'm glad you can see my vision for white. I'll have to try Goo-Gone!
DeleteThe vent looks so good! Here's another Pinterest project I wouldn't be afraid to try thanks to you. I use goo-gone for sticky things too. It does work perfectly, but it smells very strongly of orange so be careful not to use too much.
ReplyDeleteGlad you can be inspired by my effort! Thanks for the tip! I will definitely have to try that Goo-Gone since two of you suggested it.
DeleteYou did a great job. Your vent is a BIG improvement from your original vent. How long did it take you to make. I pin things on pinterest and never make them! I need to be inspired by you to try some of the things that I pin!!
ReplyDeleteI'm glad you are finding inspiration! You can do it! Pick something small. I worked on it on and off all day Wednesday. Maybe 3 hours total. I will say it would have been longer if Ben hadn't helped me cut the wood.
DeleteMuch better improvement from the old one!
ReplyDeleteWhat about goo gone (is that what it's called) for removing stickers?
Yes, I think it's called Goo Gone! I'll have to try that!
Delete